How to Clean and Maintain Your Robot Vacuum's Brushes?
Robot vacuums rely heavily on their brushes to pick up dust, crumbs, and hair from different surfaces around your home. When these brushes become clogged or tangled, the vacuum can struggle to collect debris effectively, leaving your floors less clean than expected. Over time, neglected brushes can even damage your floors or strain the vacuum’s motor. Regular maintenance keeps these parts working smoothly and ensures consistent cleaning results. In this article, we will walk through how to clean and maintain your robot vacuum’s brushes so they stay in top condition for everyday use.

Regular Cleaning Routine for Different Brush Types
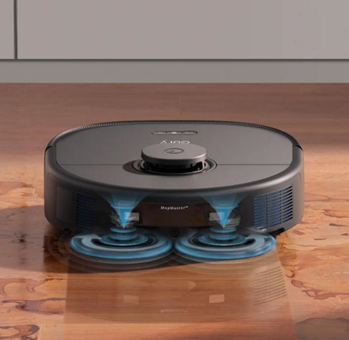
Most robot vacuums use a combination of side brushes and a main brush to sweep and lift debris. Side brushes tend to gather dust and hair at the edges, while the main brush handles heavier debris from the floor’s center. A simple routine of removing and wiping down both types once or twice a week can prevent buildup before it becomes a problem. For side brushes, gently pulling away hair strands with your fingers or a cleaning tool works well, while the main brush may require detaching it fully to remove trapped fibers. Keeping these parts clean helps maintain strong suction and prevents wear on the vacuum’s motor over time.
Dealing with Common Tangles and Blockages
Hair and string are the most common culprits that cause tangles around the brushes. They wrap tightly around the brush shaft and ends, which can slow or even stop the brush from spinning. When this happens, use a pair of small scissors or a seam ripper to carefully cut through the tangles without damaging the bristles. It is helpful to do this over a trash bin so loose strands do not spread back onto the floor. Clearing tangles regularly keeps the brushes spinning freely, preventing blockages that reduce cleaning performance.
Deep Cleaning and Inspection Procedures
Every few weeks, giving the brushes a deeper clean can further improve your vacuum’s performance. This involves fully removing the brushes from the vacuum and washing them gently with warm water to remove dust, fine debris, and built-up oils from pet fur or human hair. Allow the brushes to dry completely before reinstalling them to avoid moisture entering the vacuum’s motor area. While they are out, inspect the bristles for wear, cracks, or deformities that could reduce their efficiency. Performing this kind of inspection helps catch small problems early before they affect the entire vacuum system.

Maintenance Schedule and Best Practices
Recommended Cleaning Frequency Based on Usage
How often you clean your robot vacuum’s brushes depends on how frequently you use the device and the conditions in your home. A household with pets or lots of foot traffic may need brush cleaning every few days, while a smaller home with light use may only need attention once a week. If you notice hair buildup or see the vacuum leaving behind debris, it’s a clear sign the brushes need care. Sticking to a routine schedule, even if the brushes don’t look dirty, helps prevent problems before they start. Consistency is the key to keeping your robot vacuum running smoothly.
Proper Brush Drying and Reinstallation Techniques
After washing the brushes, it is important to dry them fully before putting them back in place. Even small amounts of moisture can damage the vacuum’s internal parts or cause mold growth inside the brush compartment. Laying the brushes out on a clean towel and letting them air dry for several hours ensures they are safe to reinstall. When putting them back, make sure they click securely into their mounts to avoid wobbling during operation. Proper reinstallation keeps the brushes spinning evenly and reduces wear on the vacuum’s motor.
Troubleshooting Common Brush-Related Issues
Addressing Strange Noises and Performance Drops
If your robot vacuum starts making unusual rattling or grinding noises, it might be a sign of a brush issue. Hair wrapped around the ends can cause friction that creates noise and slows the brush. Sometimes, a loose brush cap or a misaligned brush can also make the vacuum vibrate or lose cleaning power. Removing the brush and checking for any blockages or misplacement usually solves the problem quickly. Fixing these small issues right away prevents more serious damage to the motor or housing.
When to Replace Brushes and Where to Buy
Even with regular cleaning, brushes eventually wear down and need replacing to maintain cleaning quality. Frayed bristles or a bent brush roll can’t sweep up dirt effectively and may scratch delicate flooring. Most robot vacuums have replacement brushes available from their official online stores or customer service centers, making it easy to find compatible parts. As a general guideline, consider replacing the main brush every 6 to 12 months and side brushes every 3 to 6 months, depending on use. Fresh brushes help restore your vacuum’s original cleaning performance.
Conclusion
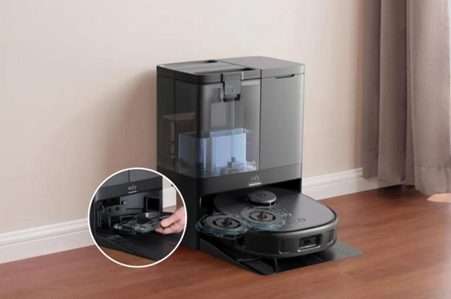
Caring for your robot vacuum’s brushes is a simple habit that makes a big difference in how well it cleans your home. Regular cleaning, careful detangling, and occasional deep washing keep the brushes efficient and prevent wear on the vacuum’s motor. If you want to reduce hands-on upkeep even further, a self cleaning vacuum can help by handling daily dust disposal for you—for example, the eufy X10 Pro Omni features an All-in-One Station that takes care of both cleaning and routine maintenance automatically in one place. By combining this convenience with proper brush care, you can extend your robot vacuum’s lifespan and enjoy consistently clean floors with minimal effort. Taking the time to maintain the brushes ensures your vacuum stays dependable for years of everyday use.
Search Blog
Category
Hot Articles
-
Popular Company Party Prize Ideas
-
5 Best Practices for Tablet Maintenance and Care
-
A Guide to the Best Headphones for 2022
-
How to Charge Your Laptop without a Charger
-
Unleashing the power of innovation: HONOR 70
-
The Importance of Labels for Supvan: Six Reasons You Need Them
-
It's Time to Install a Solar Panel Generator
-
Understanding the New Innovative Launch of Honor in 2023